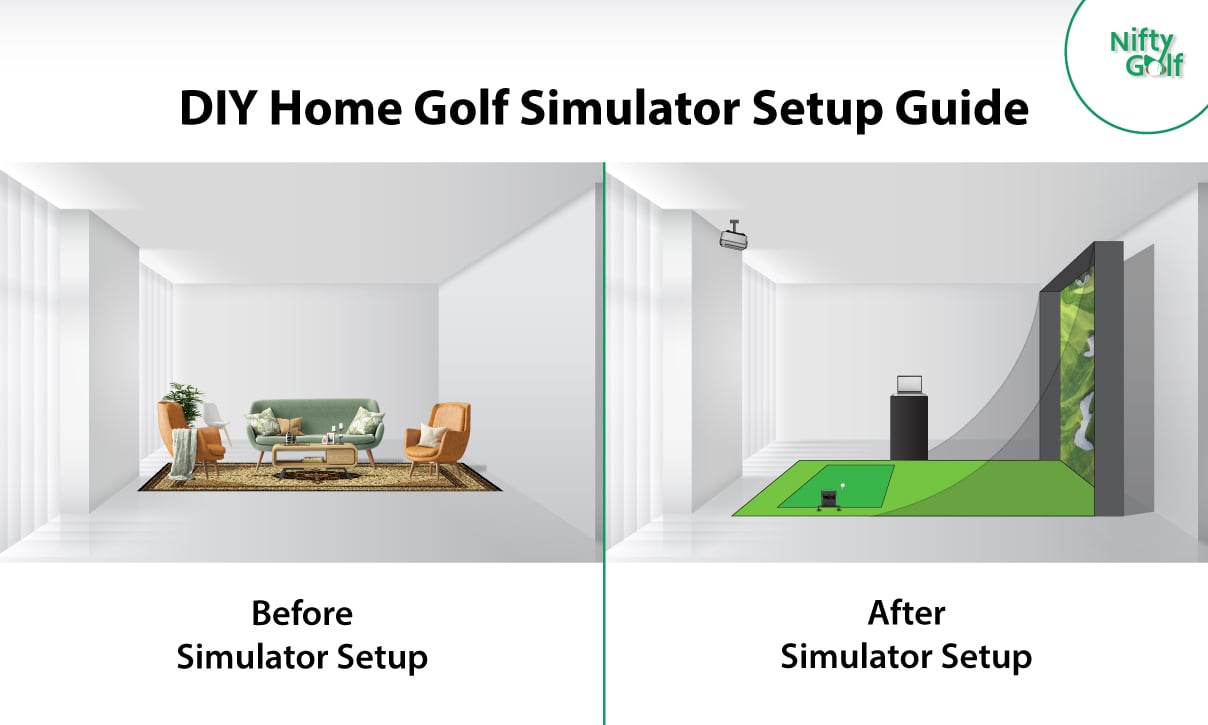
Installing a golf simulator typically involves setting up a screen to project the virtual course onto and placing sensors or cameras around the hitting area to track the golf balls’ and clubs’ movement and trajectory, along with other installations.
It is a complex process. You can take help from your simulator provider, as most of them have a team for installation. Besides, there are 3rd party agencies that also provide the setup service. But both are expensive. The efficient method is trying a DIY method.
Though the golf simulator home setup is challenging, you can do it by following the process correctly. We will illustrate the process as efficiently as possible here. Our article will help you get an aerial perspective of the golf simulator setup. Let’s start with the planning first.
Step 1: Plan Your Home Golf Simulator Setup
The planning process helps draw as many blueprints as possible before taking the first step. Poor planning is the only reason most golfers fail to achieve their intended simulator setup. They tend to downplay it and assume they can make things happen.
First, you will need to determine the space you have available for your golf simulator setup. Once the space is available, you must decide if you want to install a permanent setup or use a portable system. A permanent setup is typically more expensive and requires more installation, but it offers more options, such as a larger screen, more sensors, and more detailed data analysis. If you have the budget and space, this is the best option.
Caution: You may not get the best result if you customize/change the setup.
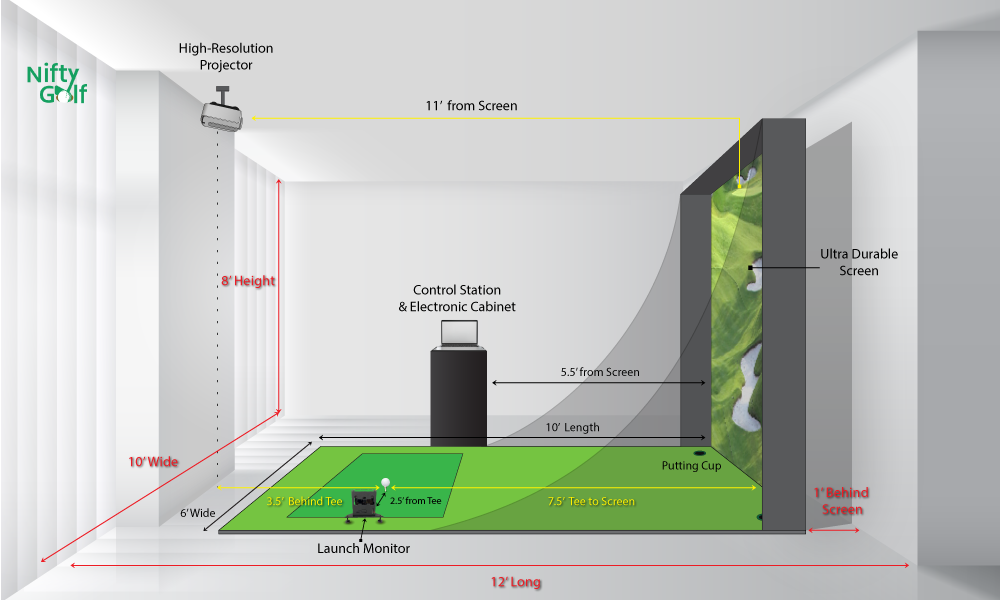
Minimum Space Requirement
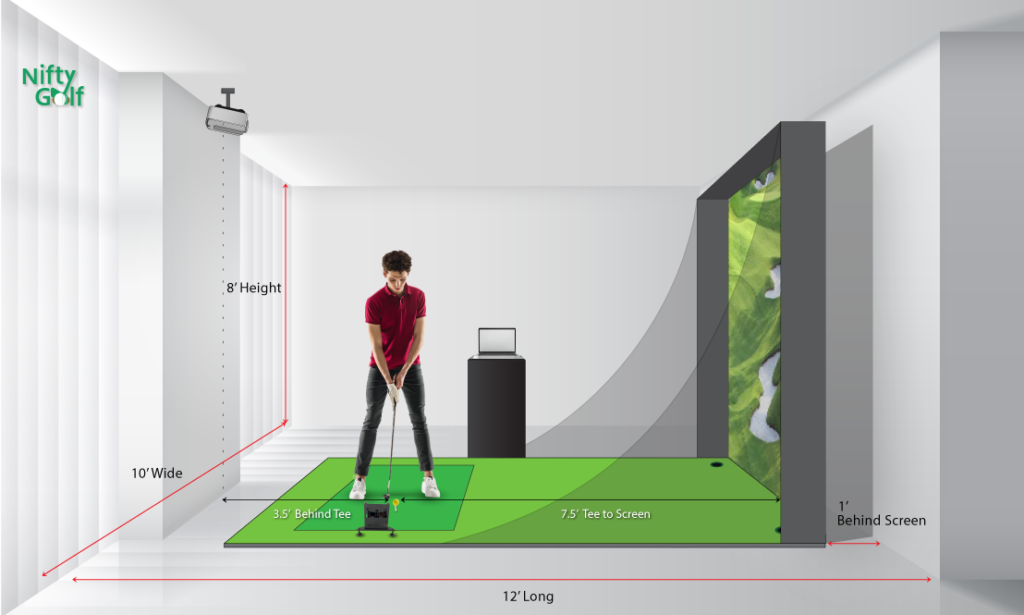
For golf simulators, the room size should be at least 12 feet long, 10 feet wide, and 8 feet high. We recommend a flexible swing of 16 feet long, 12 feet wide, and 9 feet high. At the same time, the ideal size is 18 feet long, 15 feet wide, and 10 feet high for the most comfortable swing. You can check our dedicated article on golf simulator room sizes for more details. Once you get the plan, it is time to design.
Step 2: Design Your Golf Simulator Home Setup
By now, you have a clear concept of available space and your purpose for the simulator. But the simulator is not a single item; it is composed of several items. And each of them plays a significant role in its performance. So first, try drawing blueprints illustrating how you plan your simulator to look. Before that, you better get a brief about all the equipment and the process.
As we said earlier, there should be an ample, open space with enough room for a hitting area and space to set up screens and other equipment. Choose a location for the golf simulator.
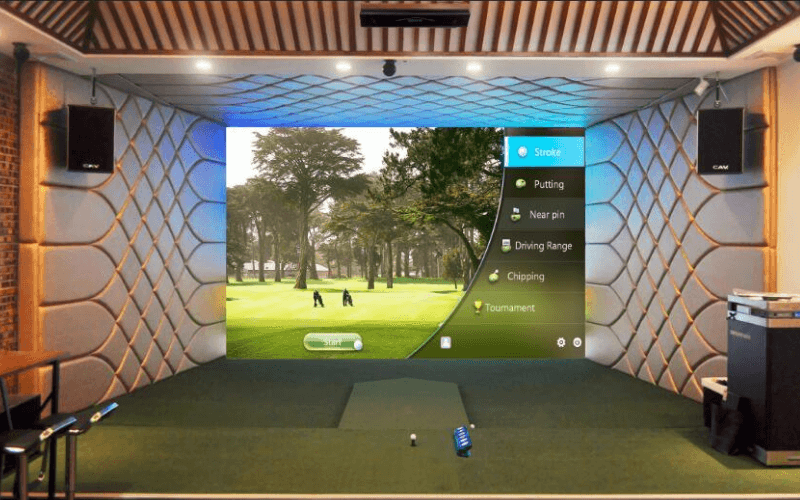
Next, you must choose a place to set up the screen or screens. This typically involves mounting the screens on a frame or attaching them to a wall. You must now consider a place to install the launch monitor too. It can be on tripods or other stands or attaching the launch monitor to the ceiling or walls.
However, the launch monitor will involve using cables to connect the projector and computer to use the device. So, plan cable management too while designing. Then, adjust the settings on the sensors or cameras and the software to ensure that they correctly track the movement of the balls and clubs.
Test the simulator to ensure that it is working correctly. This may involve hitting a few practice shots and checking the accuracy of the simulation. Make any necessary adjustments to the sensors, cameras, or software to improve the accuracy of the simulation.
Step 3: Install Your Home Golf Simulator
Once you are done designing your plan, it is time to make it a reality. Here, we’ll walk you through everything you need to know about installing a golf simulator in your home.
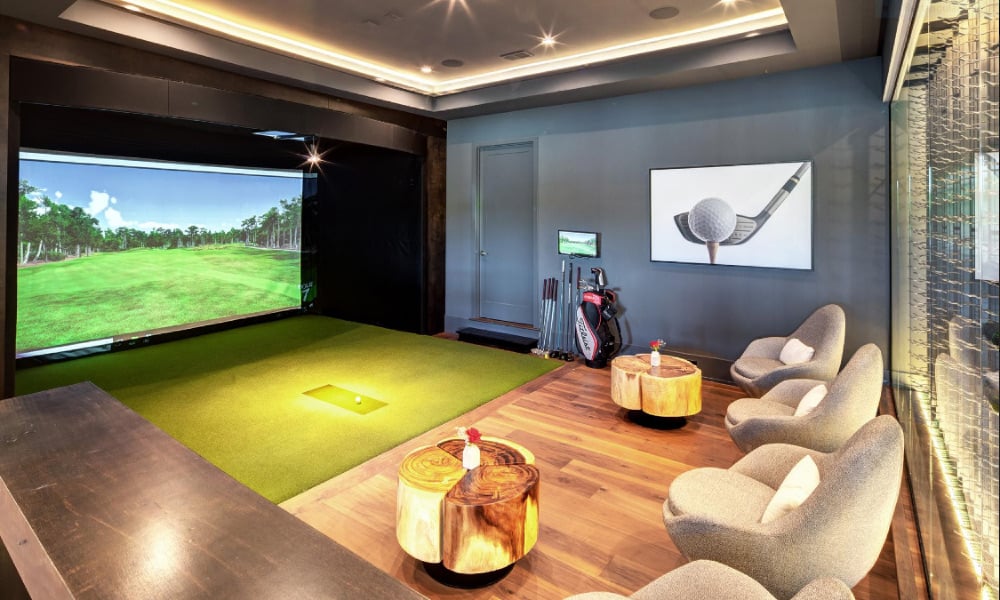
First, you’ll need to level the ground of your selected area and place the hitting mat correctly.
Prepare a golf-hitting mat.
Depending on your available room space, choose a hitting mat that suits you best. It helps cover the ground and get a natural grass feel. Once you have the correct size golf mat, you can easily place it on the floor and begin practicing and playing virtual rounds of golf. But if you need a custom setup, then follow our DIY method.
Read also: DIY hitting mat.
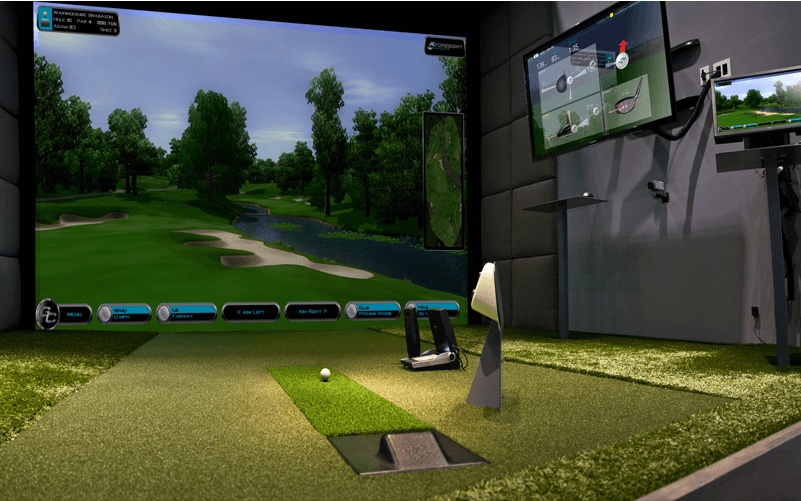
Build a Simulator enclosure.
Next, you’ll need to set up the frame and netting, also known as simulator enclosure. The frame should be sturdy and able to support the weight of the netting and simulator. In addition, the netting should be high-quality and withstand repeated hits from a golf ball. Here is a general outline of the process for making a golf simulator enclosure:
- Gather materials for the enclosure. This may include wood or metal framing, sheets of plywood or other paneling material, insulation, and any other materials you need.
- Build the frame of the enclosure using wood or metal framing. This will form the structure of the enclosure and provide support for the paneling and insulation.
- Attach the paneling to the frame to create the walls of the enclosure. Use screws or nails to secure the paneling in place.
- Install insulation in the walls of the enclosure to help reduce noise and improve energy efficiency.
- Add additional features or finishes to the enclosure, such as doors, windows, or lighting.
- Set up the golf simulator equipment in the enclosure and test it to ensure it works properly.
Read also: DIY Golf Simulator Enclosure.
Put the accessories correctly and connect them.
After the frame and netting are in place, you’ll need to install the projector and computer. The projector will be positioned at the top of the frame in the middle, while the computer should be placed beside or on the side of the swing area. Use screws or nails to attach the projector to the frame, then run the computer’s power cord and video cable.
Finally, connect the computer to the projector using the appropriate cable. If you follow these steps, you’ll be able to enjoy your new golf simulator within a few hours. In addition, we include our specialized DIY simulator guides to provide more resources here.
Moreover, you can watch the following video for a better idea. The video explains each simulator element, its importance, and how to set it up.
Don’t worry if you still find it challenging to set yourself up. Here is a list of service providers with expertise in home golf simulator setup. You can hire them and get your job done without any hassle.
Final Words
A golf simulator can be a great addition to any home and a great way to improve your game. However, there are a few things that you need to keep in mind when you are setting up your simulator.
We listed the process in this article to install your home simulator by just reading it. So, start planning today, and follow the guide; you shall install it properly. Then, let us know if you need further assistance.